Do you want to install an above ground pool?
Well, then this is the RIGHT guide for you.
Reason:
I am going to take you through a detailed step-by-step process on above ground swimming pool installation. You will learn how to select suitable materials, prepare the site, fix the pool, install pool accessories, just to mention a few.
By the end of this guide, you will definitely be an expert in above ground pool installation.
Straightaway, let us get to these steps:
Step 1
Select a Suitable Above-ground Swimming Pool Design Ideas
Let’s face it;
It will be ignorance of the highest level if you think you can just start constructing a swimming pool without considering pool design options.
At the absolute least you need something that you can refer from whenever you’re building a swimming pool in your home.
Remember this is one of the most significant investments that you’d never wish to mess up with at any phase.
So what’s the point here?
Get a suitable pool design option. We have several ways of obtaining them.
Here is a sure way of getting the best above ground pool design:
Simply Contact a Swimming Pool Contractor for Design Ideas
In many cases, they often have a lot of them since that is their area of specialization. The contractor will at the same time give you the appropriate plan and drawing for the impending construction.
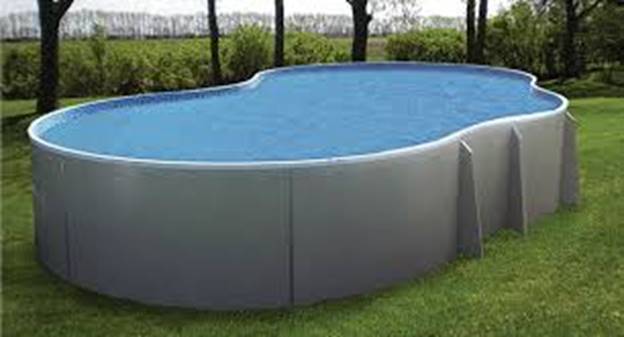
A kidney shaped above ground swimming pool – Photo Credits: WALLS INTERIOR
This is obviously based on several factors that they need to consider before ultimately arriving at a decision.
So, in other words, contractors have a way of coming up with a design plan for above ground swimming pool. This will depend on the outcome of the evaluation of the construction site.
Do a Random Search on the Internet
You can also find your favorite above swimming pool design by doing a random search on the internet.
I’ll give you a few links at the end of this section on how to get some of the best above ground swimming pool designs.
Anyway, here is how to go about it:
- Enter search term say – “above ground swimming pool designs”
- Click on images and there you go…there are hundreds of designs to choose from.
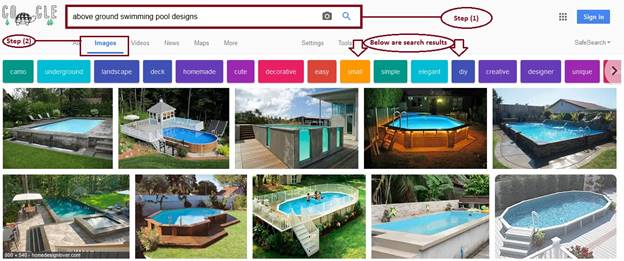
How to get above ground pool designs from Google search
For that reason, they can offer you with what you’d really need regarding preference and choice.
I always recommend that you have a variety of these designs to choose from. It makes it easier to pick what necessarily interests and appeals to you in all aspects.
Nonetheless, you need to ensure that the particular pool design you ultimately pick can suit your budget. You don’t choose something that is costly for you and ends up draining your bank account.
Learn more:
Best 25+ Above Ground Pool Ideas
Above Ground Swimming Pool Designs
Step 2
Get the Above-ground Pool Permit before Construction Work Begins
The truth of the matter is that you and I would always love to have peace of mind at all times.
By merely installing an above-ground swimming pool in your backyard without the consent of relevant authorities, you will be in problems.
It’s that simple!
Yes! You can imagine the officers knocking at your gate quite often to inspect various things to do with the swimming pool. It is really sickening, to say the least.
Here is the best part though:
You can avoid the push and shove simply by getting a permit from the local office that deals with swimming pool installation.
What you ideally need to do is:
- Present your swimming pool plan
- Avail to them the drawing and design that indicate all dimensions
- Attach other necessary requirements and fill all information
After that, a surveyor will be sent to your place to assess whether or not it meets the minimum requirements for constructing the above-ground swimming pool.
If the reviewer finds out that you’ve complied with all the specific requirements, sooner or later you’ll get the construction permit.
However, if you have not abode by some of what they require, you’ll probably get back and rectify the same before you obtain the certification.
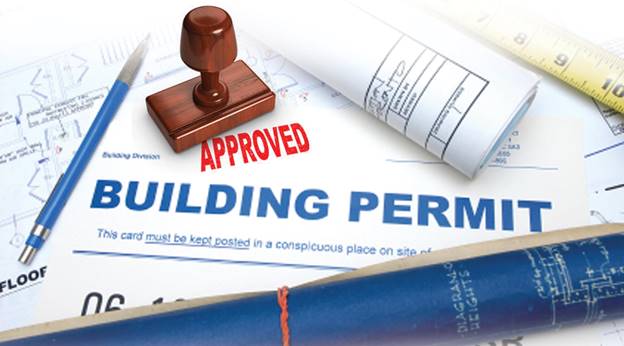
A permit for pools
Once you get this permit, you’re now at liberty to continue with the construction. This process can also be tiresome, especially if you don’t know the nitty-gritty needed.
For that reason, it is advisable always to let the contractor to handle it. Because they understand the process much better.
Learn more:
How to Obtain Pool Construction Permit
Design & Construction of Swimming Pools
Residential In-ground and Above-ground Pool Construction
Step 3
Choose a Suitable Site for Above Ground Pool Installation
After getting a go-ahead from the authorities, the next thing to do is commence the construction processes.
So how does it start? You start by first selecting the specific spot where you want to build this facility on.
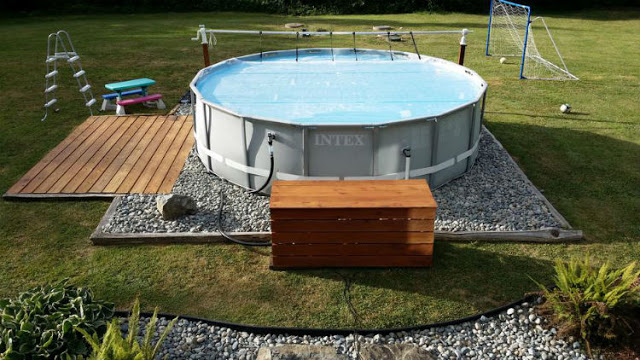
Figure 1Photo Credits: EUGENIODLEO
Here are a few things you should consider:
Where do you Consider Ideal for the Above-ground Pool?
Again, it depends on where you deem ideal for it to be situated in your homestead. A perfect spot is in the backyard where there is likely to be less movement of people.
Consider the available Space (Know the size of Above-ground Pool)
When choosing a suitable site for installing your above-ground swimming pool, it is vital to ensure that you consider the space.
It implies that you need to figure out the size the swimming place will occupy and whether it would be necessary and enough.
Pay Attention to Privacy & Tranquility
You also need to look at the tranquility and the privacy of the selected spot. It is necessary to install a swimming pool in a relatively serene part of the homestead.
May be you can consider time to consider an isolated place.
Choose a Place without Trees
Additionally, you need to make sure that the specific site you’re choosing is kinda free from many large trees.
Because these trees are often inhabited by birds, which can be a nuisance when they drop their wastes and hence litter your pool all the time.
The leaves from such trees can also keep on falling in your swimming pool and consequently littering the pool and its environs.
So primarily, ensure that the site is free from such elements.
Learn more:
14 Above Ground Swimming Pool Ideas
Step 4
Prepare the Site Where to Install an Above Ground Pool
Of all the phases for installing the above-ground pool, this seems to be the most involving in regards to labor intensiveness.
And surprisingly, you got to do it perfectly. It is what significantly determines the overall outcome of the pool. If you do it right from the start, be sure of having a great finish and vice versa.
So what does site preparation entails?
Let’s quickly have a look:
Mark the Area
This is the first thing to do upon selecting the particular spot for constructing the pool. You need to mark all the dimensions of the area that you will dig.
The markings should be visible to make it easy for you or anyone else to see when digging. This prevents cases of excavating incorrect dimensions that might, later on, affect the construction in one way of the other.
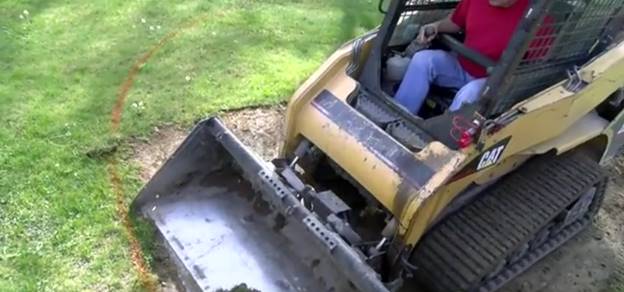
Can you see the red mark? Well, it is a mark showing where you intend to install the pool. Photo Credits: VIDEO BY CRAIG HEFFERNAN
On the same note, you need to create a temporary fence around the construction site. The essence is mainly for safety reasons and preventing disturbances.
Let’s now move on to the next step on-site preparation.
Remove the Sod
It is among the essential things that you got to do. How do you do it?
Dig the sod from all the entire area beneath the pool all around. It is important to do so because it will help to make assembling relatively easy.
Digging to remove sod using this means is also advantageous because it’ll, in the long run, make the pool wall sturdy and less prone to scratches, dents, and accidental damage.
But then you also need to ensure that you factor in the requirements as stipulated in your local building and fencing code.
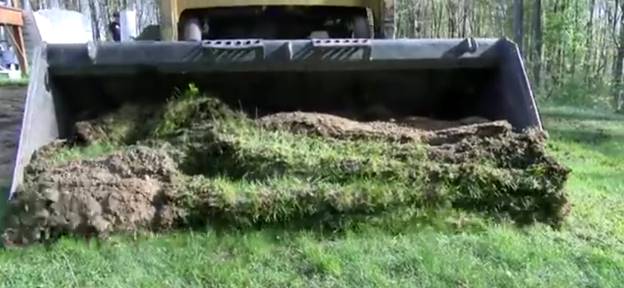
Removing sod from the site – Photo Credits: VIDEO BY CRAIG HEFFERNAN
Some regions require up to a minimum of six inches of a clear area cut. So it would be imperative to check and confirm with the guiding principles of your local code.
Level the Site
Now that you’re done with removing sod, the next thing to do is level the entire site. Primarily, you need to bring down the higher ground to equal the height of the lowest level of the field that you didn’t sod.
An ideal method of doing is by digging out the higher side. It is actually recommended because it makes it easy for the whole site to be of the same level.
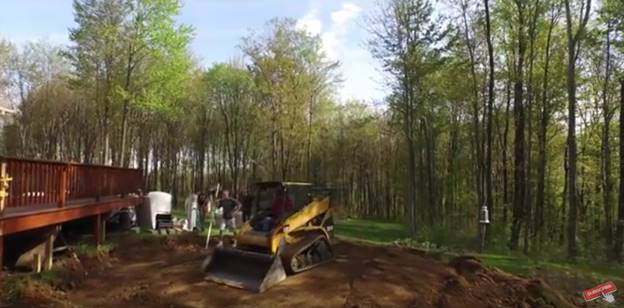
Preliminary stages for leveling the site – Photo Credits: VIDEO BY CRAIG HEFFERNAN
Nevertheless, raising up the lower side to match the level can also be done. But the process of attaining it correctly to match the required safety standards is too overwhelming and relatively expensive.
You need to incorporate particular methods, use heavy machinery and integrate some technology to make the entire system feasible. It can be stressful, tiresome and time-consuming.
So fundamentally, it is a risky involvement if you choose to go that route. The pool will merely depend on you to use your best decree when preparing the ground depending on the elements that you’ll encounter.
But all the same, it is recommended to talk to the contractor and the building zoning administrators to authenticate if using this method is admissible.
The intention here is necessarily to create awareness of this information so that everyone would know what is needed for installing any type of above-ground pool.
Drainage
It is arguably another fundamental consideration that you have to factor in when preparing the site for above-ground pool installation.
So what must you deliberate in this case?
First, the site should have additional drainage mechanism that would allow excess water to drain off quickly. These should be located in areas adjacent to the edge of the poolside.
Does it sound so technical?
Ok. Let me simplify it further.
There are times when perhaps a newly constructed pool may prevent water from flowing naturally on its previous path.
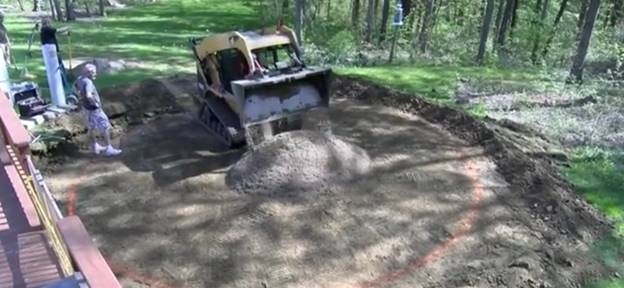
You’ll use this to compact the foundation – Photo Credits: VIDEO BY CRAIG HEFFERNAN
This can make most of your backyard if not all of it to be swampy. What follows is a belief that the pool is probably leaking while in actual sense it isn’t.
It, therefore, necessitates that you have a proper drainage system that would prevent blockage of water path or stagnation in specific areas.
The fittings should be done correctly to avoid all these types of inconveniences within your homestead.
Is it simple now?
I hope it’s understandable.
Learn more:
Preparing Site for Above-ground Pool Installation
How to Prepare Site for New Above-ground Swimming Pool Installation
Step 5
Start the Above Ground Pool installation Process
Now, this is where the real deal is. I know it is the step you have been waiting for…the actual construction.
For that matter, you need to be particular and meticulous in regards to various elements that you do in this phase.
Since at this stage most of the preparation aspects are already complete you only need to ensure that you get all the actions right.
And if possible, ensure that you work with your contractor hand in hand to make the entire process seamless.
But, wait a minute!
Even before you proceed with the process, I want you to pay attention to the following critical aspects:
Confirm the Material for the Above Ground Pool Parts and Components
It can be tricky when it comes to choosing the types of materials you use to construct an above-ground swimming.
So many options from different brands are often at your disposal. Thus, you can get even more confused.
But don’t freak out, I’m here to help you understand how to maneuver in this challenge.
After listing down all the items and materials that you need, review them all one by one.
But then again; your contractor can also help you to choose the right material for above ground swimming pools.
Remember, an above ground swimming pool can be made from resin, aluminum or steel. It will all depend on the kind of pool you intend to have.
As I said earlier, they are familiar with most of the quality materials to use. Given that this is their area of specialization.
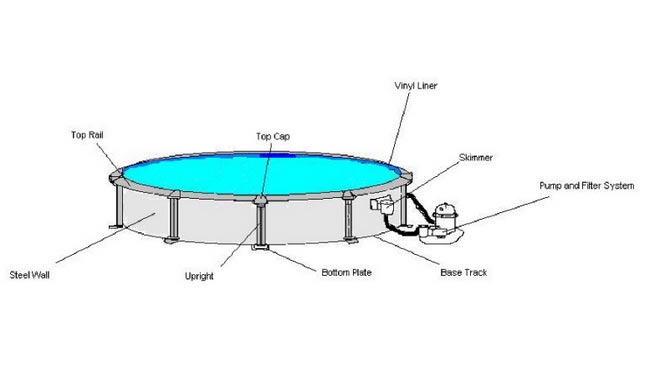
Parts of above ground swimming pool – Photo Credits: KNOW YOUR POOL
Together with the swimming pool contractor, you should evaluate materials for every section such as:
- Above ground pool wall
- Tracks on which the walls will rest on; most above ground pools have top and bottom tracks.
- Connector plates; these basically connect the tracks
- Caps to cover the top rails
- Fastening hardware such as screws and nuts
When you work closely with them, there is a high chance that you will get quality materials at affordable prices. In the long run, you end up saving quite a considerable amount of money during above ground pool installation process.
It’s actually advisable to go for relatively affordable materials as a matter of cost-saving. However, you should never compromise quality for the price, regardless.
Pay Attention to the Topography & Drainage where to Install Above Ground Pool
The landscape of the pool site is a vital consideration. When constructing, ensure that other than making it flat, it does not pose a risk of collapsing.
Drainage is also vital. You don’t want to install this type of pool in an area where it will block the water path.
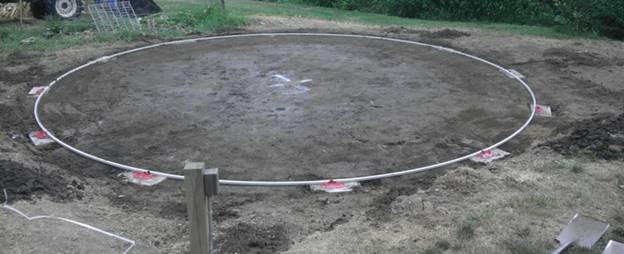
Choosing an appropriate topography for your pool – Photo Credits: AQUA PALACE
Also, you can’t really take the risk of making your compound drown in stagnant water just because the drainage system is imperfect.
You can just imagine the level of inconvenience and nuisance it will cause. So primarily, just ensure that you pay critical interest to the overall structure of your compound to avoid experiencing such a mess.
Step 6
Lay Down the Foundation for Above Ground Pools Installation
Now that all the materials are available at the site to start the construction process. Laying down the foundation becomes the first element of this construction.
The right materials that many manufacturers and even contractors use for laying a stronger foundation are patio blocks or stones.
The blocks should go deep into the virgin soil. Never expose the parts except from the top side of the pool.
If the sides of the patio blocks are exposed, there is a likelihood of erosion occurring from beneath the pool.
Ensure that you level the blocks side to side and from front to back. The essence of this is to allow the pool frame, base plates, and the track to hold on the block firmly and uniformly.
And that is why it is a requirement that an above-ground swimming pool is built on a safe and stable foundation, and also be as flat as it can.
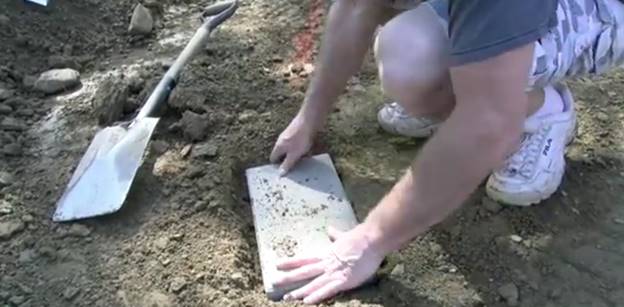
Making the swimming pool foundation – Photo Credits: VIDEO BY CRAIG HEFFERNAN
Simply determine the exact position where you should put the blocks. With this, you are always sure of a strong foundation.
The key feature here is ensuring that the blocks are placed in ideal places on the ground. Additionally, the posts and frames must also be consistent since they’ll have a net effect on the building of the pool wall.
Step 7
Assemble the Pool Wall of the Above Ground Swimming Pool
The type of your pool depends on the shape you’ve chosen. In most cases, above-ground swimming pools are often oval or square.
When assembling the pool walls, it is essential to ensure that you do it uniformly. Such that all sides are constructed simultaneously.
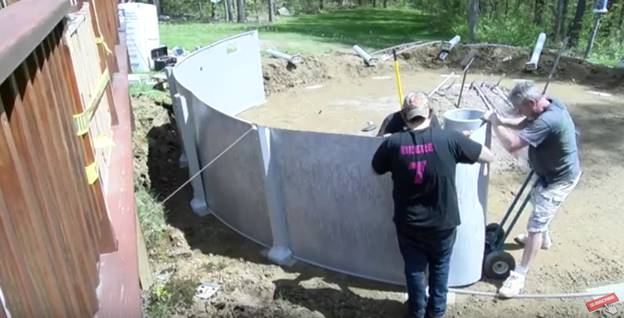
Assemble the swimming pool wall – Photo Credits: VIDEO BY CRAIG HEFFERNAN
And for a better result, you’d need to also continually check and recheck that the walls of the pool are even throughout. It is the most significant aspect of pool wall assembling.
This ensures that the pool posts will not at any moment during and after construction prominently lean in or out. It also helps in ensuring that the liner will fit appropriately when it is fixed.
Another imperative point worth noting is that in the event the pool is not perfectly round, there is a high possibility that the liner will be stretched in an unintended way.
In this case, it will form wrinkles which can be difficult to remove given that they result from the stretching of the material itself.
Another cause for the wrinkles on the liner is dishing the bottom of your pool. It is, therefore, necessary to make sure that the pool is entirely round to avoid such cases.
As you gradually work up the pool’s perimeter wall, it gets into place and right into the track. To get better results when doing this, it is advisable to call in other people to offer their assistance.
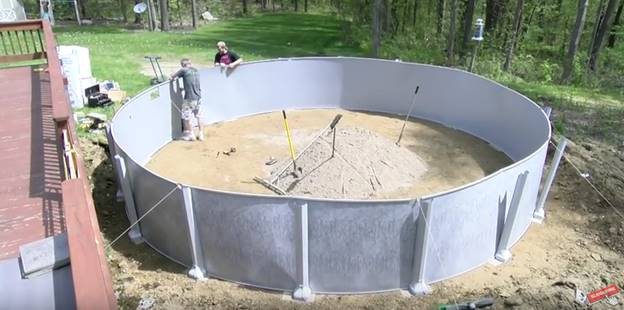
Finishing on the first phase of installing the wall – Photo Credits: VIDEO BY CRAIG HEFFERNAN
Often, the materials for constructing the wall do come with nuts and bolts. You should use them to connect the walls by tightening them.
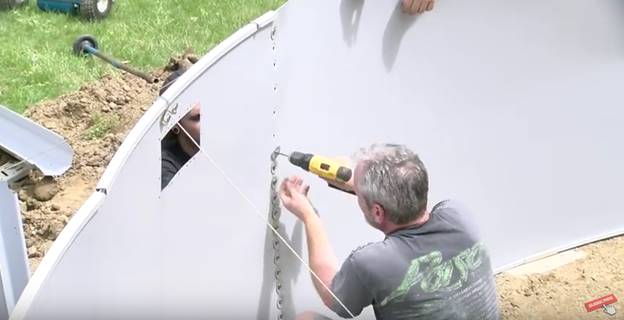
Joining two ends of the above ground pool wall – Photo Credits: VIDEO BY CRAIG HEFFERNAN
The sizes of these nuts and bolts also vary depending on the kind of your pool. So make sure that you tighten each one accordingly and seam with duct tape.
Fill Edges of the Pool Wall & Level the Ground
Now fill the small spaces between the wall and the ground.
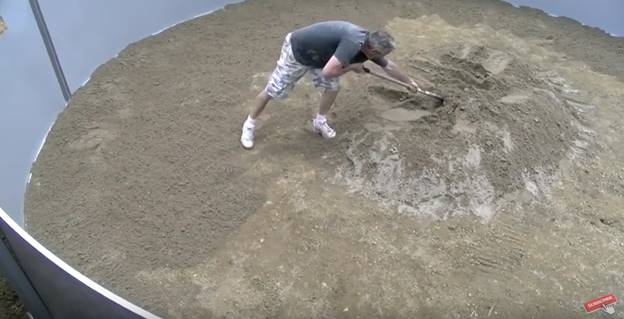
Filling spaces between the pool wall and ground – Photo Credits: VIDEO BY CRAIG HEFFERNAN
Now level the swimming pool floor and compact the soil beneath it.
You need to make the site sturdy. After digging here and there, you must ensure that you compress the loose soil around.
Principally, using high-grade machinery is acceptable because they ensure the soil around is condensed appropriately.
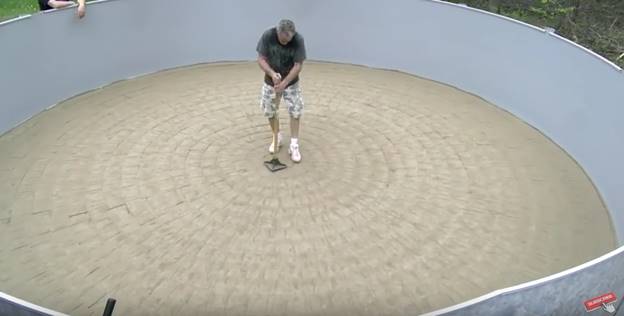
Compacting the swimming pool floor – Photo Credits: VIDEO BY CRAIG HEFFERNAN
Remember, when you compact the soil (or any other material), you’re basically establishing a strong foundation. This way, you’ll be sure that the site area is reliable, durable and most importantly secure.
Furthermore, it can withstand the weight of water and impact by swimmers.
Step 8
Install the Liner of the Above Ground Pool
One thing for a fact is that an above-ground pool is inadequate without a liner. This is merely a vinyl bag made to hold water within the frame of the pool.
This element is also regarded as the most significant one in this kind of pool. And on the same note, it can end up being the most frustrating of all elements.
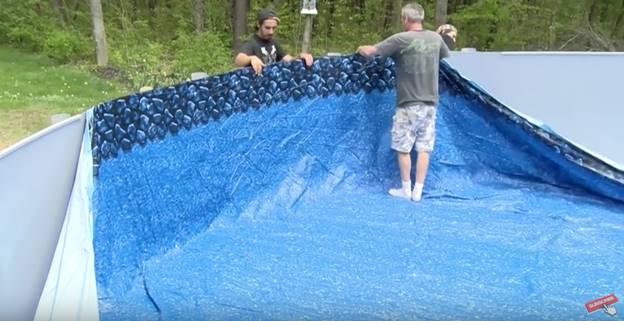
Install the pool liner material – Photo Credits: VIDEO BY CRAIG HEFFERNAN
In other words, there is a need for ensuring that they are handled and installed appropriately. This is important as the vinyl need not to be damaged.
At this stage, you’ve already finished building the cove. It is what prevents the liner from potential slipping beneath the wall of the pool.
The cove also gives a shielding cover between the liner and the metal frame of the swimming pool. Remember line is a delicate component hence you need to be careful when installing it.
Open the box carefully and never use a sharp object when doing so. The ground where you’ll place it upon removing it from the box should also be free from a foreign object that might puncture it.
Inspect it keenly to ensure it the seams are correctly sealed and that it doesn’t contain any tears then spread it out to get heat from the sun. The sun’s warmth makes it elastic and relatively easy to install.
During installation, ensure that they rest on the ground appropriately and should never carry any weight from water.
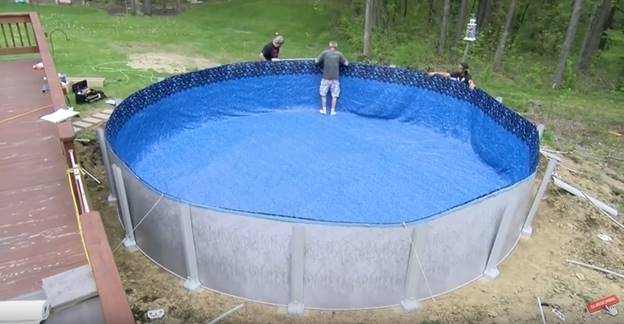
After installing the pool liner – Photo Credits: VIDEO BY CRAIG HEFFERNAN
Also, make sure that there is no air pressure in between the ground and the liner. Additionally, just know that the manner you hang it depends highly on its style.
Do everything possible to ensure that you avoid damaging by avoiding pulling, stretching or dragging it in as much as wrinkles are inevitable.
If the wrinkles are too much, use a vacuum hose to decrease it and seal it using masking tape and cardboard.
Just do all you have to do and ensure that you avoid damaging the liner when installing it. If you probably find it difficult, consult the services of an expert.
Step 9
Install the Electric, Plumbing and Pump and Filter Systems
Now you’ve gotten into the technical phase that calls for technical knowledge. You have to be proficient in installing all these pool mechanisms correctly.
So what does it take to do it?
Installing Electrical System of the Above-ground Pool
You need electricity in your pool for two major reasons:
- Pumping water
- Lighting the poolside
It is something that you can mostly do as long as you know the basics.
However, it would great if you also consider services of a professional electrician. But the truth of the matter is that electricity is scary when done inappropriately.
At times, it can lead to loss of life or serious injuries.
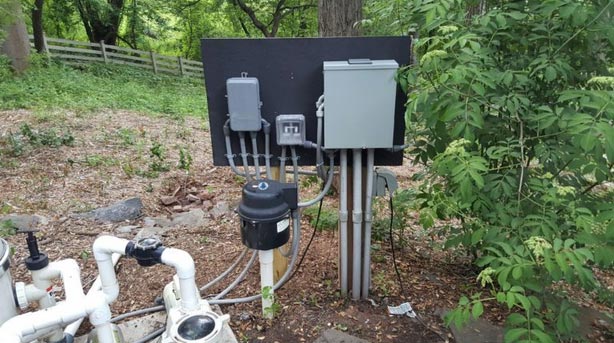
Swimming pool electrical system – Photo Credits: KB ELECTRIC LLC
Either way, here are a few things that you got to have in mind when installing electricity in your pool:
- Total Amperage Your Pool Needs
You must understand how many amps would be suitable for the pool before even starting the wiring process.
The essence of this is to allow you to understand the specific size breaker required at the electric box.
- Size of Wires for Electric Connections
You must know the size of wire that would be enough to run to the pump.
Ordinarily, an ideal above-ground swimming pool would require at least a 20-amp breaker. It will also efficiently deliver electricity using 12-gauge wire.
i. Consider Additional Electricity Needs
Ideally, a swimming pool can be vast and hence require more electricity needs. You have to factor in all the possible applications that will require electricity.
Elements such as salt chlorine generators and ozonators need electricity. Therefore, you got to look into it and find out whether they can affect the electricity supply.
Check whether they need an upgrade or if they can work just fine.
ii. Adhere to the NEC rules
You know what, there are some basic rules that you may fail to follow but still nothing major happens to you.
But when it comes to electricity, stick to the rule set by NEC. Ignoring such regulations can lead to the mother of disasters.
Talk to the representatives at their local officers. They will advise you on many aspects regarding wiring of your pool.
Fixing the plumbing system
The plumbing system in an above-ground pool can be a little bit challenging. In essence, they are significant in controlling in-flow and outflow of water.
Here is a simple layout:
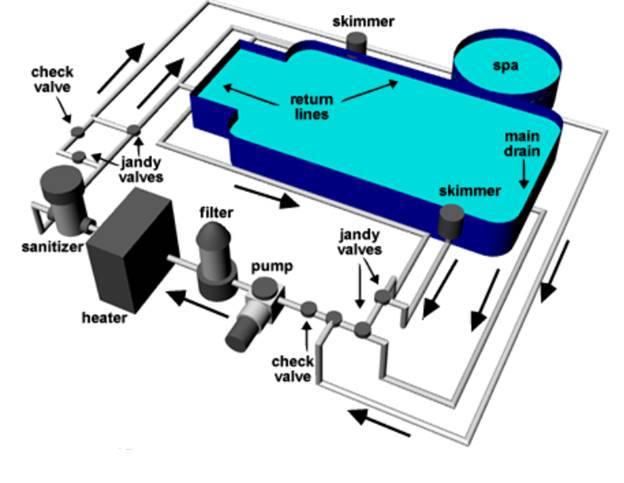
Swimming pool pumps and solar heater – Photo Credits: INYO POOLS
So it means that you have to do it right. It is also essential to ensure that you use the right types of pipes and other materials when installing the plumbing system.
The most significant challenge always arises when you fail to level the ground appropriately. Otherwise, most of the plumbing aspects when fixed correctly will not be a cause for concern.
Installing Pump and Filter System
The pump and filter system is the central part of the above-ground swimming pool. It plays many roles such as:
- Enabling water to move in the pool
- Removing debris
- Chlorine distribution, among others.
If you don’t have this system in your pool, it will merely become a pool of stagnant goo.
When installing this system, you first need to determine the ideal type for you. You need to make a choice based on:
- Reliability
- Usability
- Ease of maintenance
- Cost-effectiveness.
Another vital element regarding the installation of pump and filter system is that it should be placed at a level point and elevated from the ground.
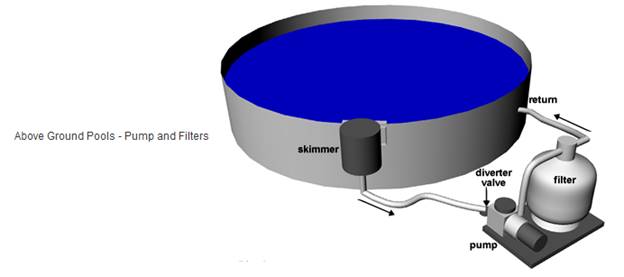
Photo Credits: INYO POOLS
Do everything possible to make sure that it sits solidly on a level base. It is also important to always monitor the skimmer.
It helps in enhancing its efficiency given that you will always remove the clogs from its basket hence allowing water to flow freely.
While at it, you should never let the water levels to drop below the skimmer. This is one of the surest ways to put the entire filtration unit out of action and rendering it useless.
Step 10
Assemble the Frames for the Above Ground Swimming Pool
This marks part of the final stages of constructing an above-ground pool. At this point it necessary to make sure that you follow the manufacturer’s guideline to the letter.
When assembling the frames, create a consistent spacing between the track connections. As you go on, always verify the roundedness and evenness of the facility.
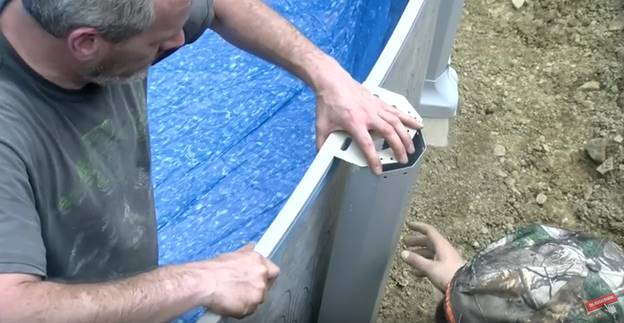
Assembling above ground pool frame – Photo Credits: VIDEO BY CRAIG HEFFERNAN
By the time you’re finishing the assembling the pool, the final framework, all the dimensions have to be uniform hence making the surface relatively smooth.
Arrange all the posts and rails left behind and those that were loosely attached initially and attach all of them accordingly.
And before tightening the bolts and the screws for the last time, make sure that you plump the posts as evenly as you can. Now fasten the bolts and screws entirely into the rails.
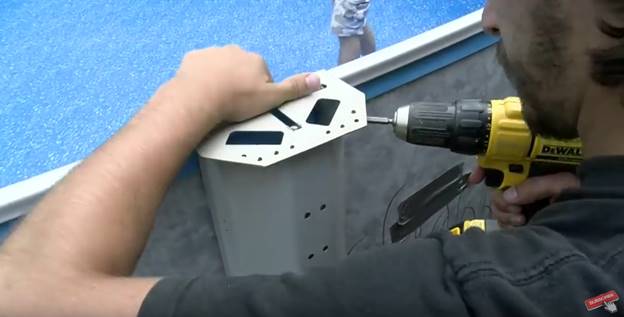
Fixing frame and rails with screws – Photo Credits: VIDEO BY CRAIG HEFFERNAN
When doing this and any other tasks, you also need to make sure that you enhance your safety and that of any other person working on the pool.
Always wear protective gears where possible and use high-grade equipment that are easy to operate to avoid causing unnecessary injuries.
Step 11
Now Inspect & Fill Above Ground Pool with Water
When you get to this part, it means that you’re done with all the technical aspects of installing the above-ground swimming pool.
In this stage, you merely need to carry out all the necessary inspection all over the pond. The interest here is to determine whether all functions are efficiently working before you can start using the pool.
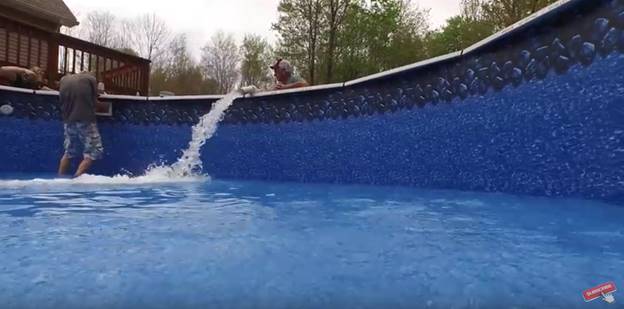
Filling the pool with water – Photo Credits: VIDEO BY CRAIG HEFFERNAN
Inspection is wide-ranging as it involves quite some elements. You have first to confirm that every feature of the pool is safe for users.
Then, you must check if all the other aspects including electricity, pumps, and filters as well as plumbing systems are working efficiently.
The ideal way for conducting a thorough inspection of a new unit is by filling water to the brim. You can now go ahead to do the tests.
If in case you find any default or a malfunction from a particular feature, you need to rectify it as quickly as possible. This will prevent the pool from further damage.
But if at all you find out that every aspect of the pool is working well, you can continue filling pool to the brim. You should then wait for a few days before finally starting swimming on it.
While at it, ensure you fill the pool using clean and treated water. Contaminated water can harm you in the long run in one way or another.
Step 12
Install Accessories for the Above-Pool
Now, your pool is almost ready.
However, there are a few things you must do:
Install the Above-ground Swimming Pool Ladder
Well, you don’t expect people to jump in/from the pool. That is quite dangerous.
Normally, the above-ground swimming pool kit comes with its ladder. In case it doesn’t, then you can fabricate a ladder or buy a fully assembled design.
Whenever you’re buying an above-ground swimming pool ladder, you should consider the following:
- Type of material
- Height of the ladder
- Whether the ladder is compatible with the pool or not.
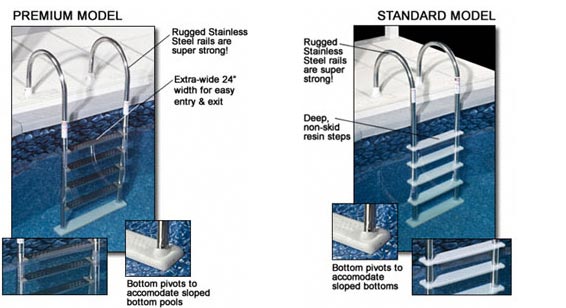
Above ground swimming pool ladder – Photo Credits: POOL AND SPA
Now, this is how to install the ladder for above ground swimming pool:
- Clean the swimming pool ladder cups; this removes debris or dirt
- Set the ladder to an appropriate angle
- Prepare a section on the ground where you will place the base of the ladder.
- Let the ladder rest on the above ground swimming pool wall and secure if using appropriate fasteners
Normally, the installation process will vary depending on the design of the ladder.
Install a Swimming Pool Cover
To protect the pool from debris, snow or the sun’s heat, you must cover the above-ground swimming pool. Pool covers for above-ground pools are also effective ways to reduce the cost of owning a swimming pool.
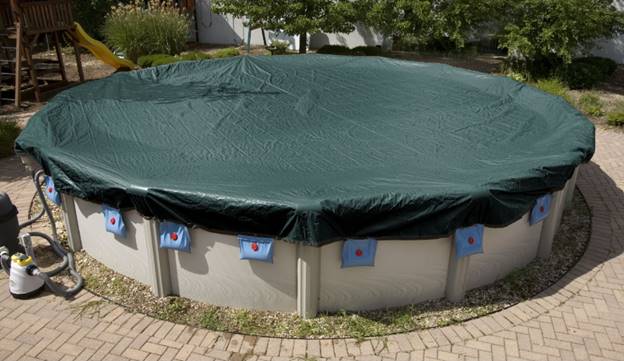
Photo Credits: POOL DESIGN IDEAS
I have a good article for you on this – Ultimate Guide to Swimming Pool Covers. It contains everything you need to know about swimming pool covers.
Fix a Swimming Pool Enclosure
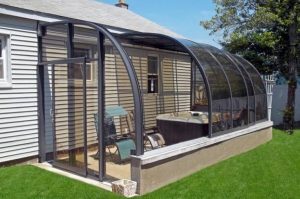
Do you want to extend the swimming season? Well, a pool enclosure will guarantee exactly that.
Here is a good example:
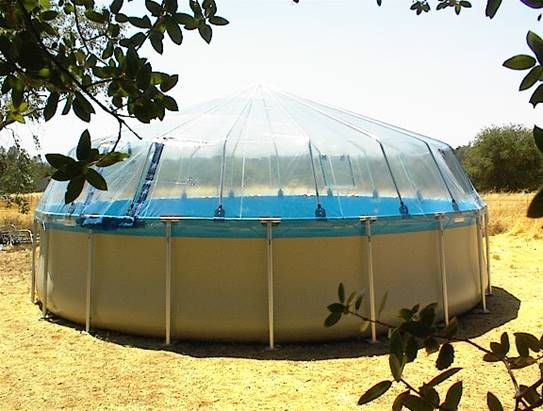
An enclosure for about ground pools
With a pool enclosure, you can swim all year round. Furthermore, it leaves enough space above the pool – you can swim after closing it.
Again, I have a Complete Guide to Swimming Pool Enclosure. It has everything you need to know about swimming pool enclosures.
So, what’s the bottom line here?
These accessories will ensure safety while making it convenient for people to use above-ground swimming pool. For a fact, your above-ground pool is not complete without a ladder and either a pool enclosure or cover.
But, that’s not all you need to know when it comes to above ground swimming pool installation.
Here is something you should remember:
Step 13
Landscaping Around Above Ground Pools is Important
This phase involves clearing the poolside and decorating it to look relatively appealing and convenient for swimming.
The truth of the matter is that it will take quite some time before you get your ideal finished landscaping appearance.
So what you need to do is merely disperse all the excavated materials evenly the moment you’re done with building the pool.
It is recommended that you use the excavated material to level the poolside yard. At the very least, you’ll find some few spots that require being filled up.
Once you are done with this, you can start coming up with landscaping ideas that will make the place look attractive like you’d want.
Several landscaping ideas are available on the internet. You can only search and work on the specific one that meets your preference.
Remember this is something that will have to be progressive. But in the meantime, you can enjoy using the above-ground swimming pool.
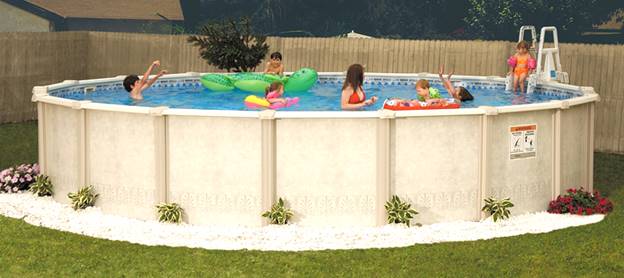
Photo Credits – ADCOCK POOL AND SPA
Well, I know the process may seem hectic however; it should take you 1 to 2 days to install an above-ground swimming pool.
If you follow these steps, I am quite certain nothing will go wrong.
But, before I conclude this above-ground pool installation guide, here is one thing you know:
Bonus: How to Install Above Ground Pool Videos
Below are 4 videos on above ground swimming pool installation. They will give you more insights on the above-ground pool installation process.
Video by: Craig Haffernan
DIY Above Ground Pool Installation by Family Leisure Indianapolis
Round Above Ground Swimming Pool Installation By Pool Supplies Canada
How to Install an Oval Above Ground Swimming Pool by Leisure Living
Learn more:
Installing Above Ground Swimming Pool
Types of Above Ground Swimming Pool Ladders
How to Close Above Ground Swimming Pools
Honestly, with this guide, I am sure you can be an expert in above ground swimming pool installation.
Now it’s your turn:
Do you have any questions on above-ground swimming pool installation?
Well, I’d like to hear from you.
You can leave a quick comment below.

